Sunday, June 28, 2015

How to make a paper leaf: A Pictoral Tutorial

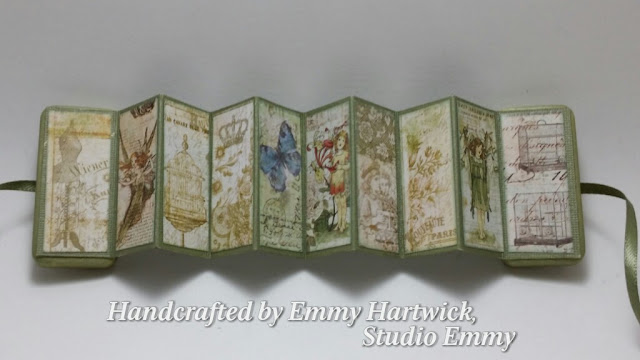
Sometimes, when it is very early in the morning, or very late at night, I realize I need something in my studio, but I cant find it. . . . like this morning. I wanted to put leaves on my card, but I could not find my leaves from Michaels. I buy the ones in the bridal section. So, I decided to make some leaves from my scrapbooking paper.

 
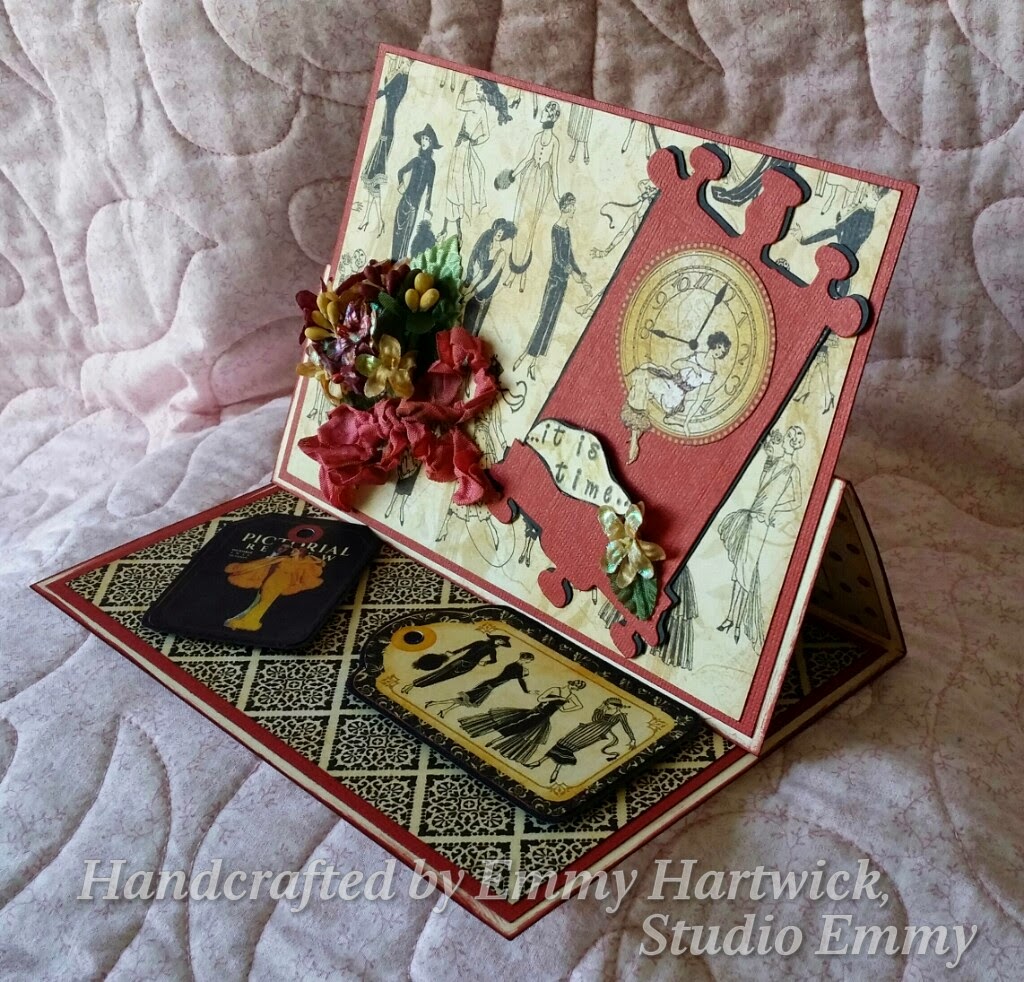
This is the card I was making. I will walk you through the simple steps of how you can make your own paper leaves.
You will need:
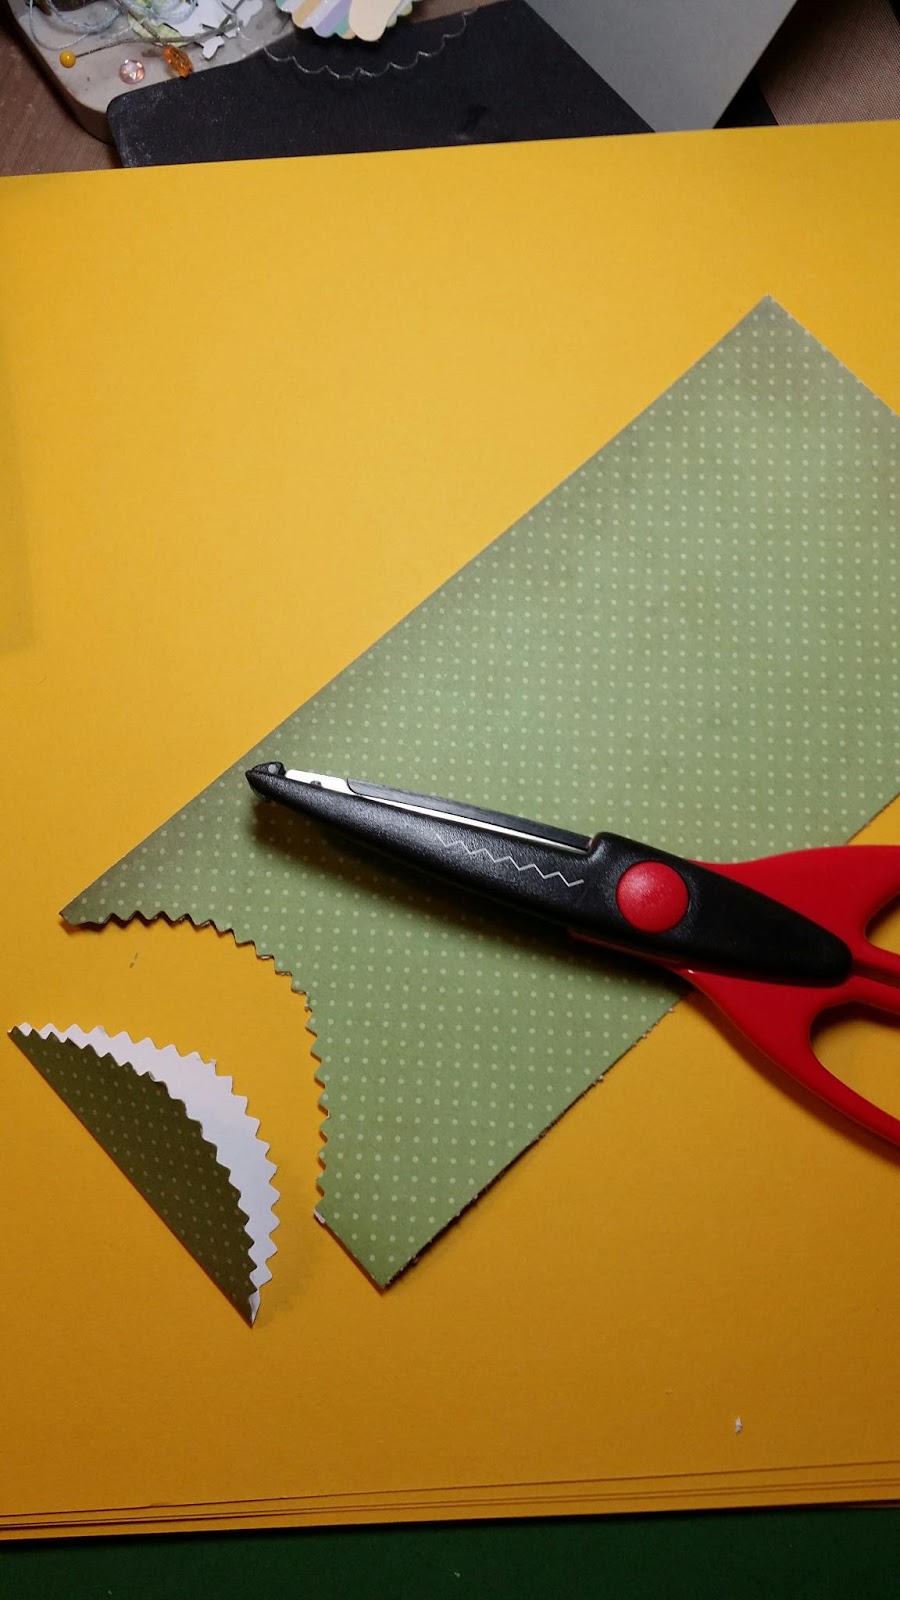
Scissors that have a fancy edge similar to these.
Some scrapbook paper.
A scoreboard and scoring tool.
An ink pad.

 Fold one end up a bit
 so that it is half the width
of what you want your finished leaf to be.
Use your fancy edge scissors
 to cut an elongated oval
on the fold you just made in the previous step.

Keep the "leaf" folded in half.
Use a scoreboard to mark the "veins" in the leaf.
Put the leaf at a slight angle on the board to do this step.
Unfold your leaf.
When you are finished scoring it,  
it will look something like this.
Use an ink that matches the paper to ink the edges of the leaf.

I inked it on top and underneath to get as much ink along the edges as possible.
Also, run the ink pad lightly along the center fold and along the veins for some dimension.
Use a pencil or the handle of a paint brush to give your leave a bit of a curve.
Simply run the pencil or handle under the paper leaf and it will take on a bit of a curve.
If you want to add more dimension,
curve the leaf a bit in the opposite direction before you glue it to your project.
I used a dab of hot glue to attach the leaf to my card.
You can see how I used the leaves behind the roses and ribbon.


It worked and when you look at the card,
you don't really notice that the leaves are made of scrapbook paper! 
I actually like the technique and think I will use it often.
 

Thanks for stopping by.
If you want to see this in a slide show,
please check out the video on my You Tube Channel:


As always, your comments and questions are welcome . . . and until we meet again, may the Lord hold you in the hollow of His hand.

Emmy
 

Saturday, June 27, 2015

Babies and Graduation . . .


It is a rainy Saturday. I planned to do many things today and also go to a graduation party, but between the constant pouring rain and not feeling 100%, I am just staying home. It has been a long week of challenges and it feels good to just stay in my cozy house and catch up on some recorded TV shows and movies and spend some quiet time here with my hubby. It seemed like a good day to catch up on my blog. :-)

I have continued to make cards. Here are a few that I made recently.
.
I made this for a friend who recently became a grandmother.
 It is her wish that the baby will call her "Oma", which is the German form of Gramma.
I made this card to celebrate her new grandson and the hope she will get her wish.
I mixed acrylic paints to get the right shade of yellow for the edges of the card front.
 I cut the letters out with one of my dies and tried to make the letters look like building blocks.

On the inside of the card, I put a rattle that I made from using one of my scalloped oval nesting dies.
 I stacked it with cardstock for dimension, and inside I placed little confetti images I picked up at Michaels.
I traced the handle of a meat fork for the handle!
 It is a shaker, but being on the inside of a card, it really doesn't get shaken very much.
I used acrylic paint along the edges of the inside of the card.
 
Purple and Gold are the school colors for this graduate.
I used some distress ink on the outside edge of the front of the card.
I used 6-strand embroidery floss to make the tassel.
I found the inspiration for this card on Pinterest.

I use my MS Word program to print the interior of some of my cards.
This is printed on parchment.
I used distress ink along the outer edge of the interior of the card.

My alma mater, Le Roy High School's colors.
I used one of my dies to cut out the letters and numbers.
I put some black glitter glue on them and on the cap to glam it up a bit.
I painted the outside edges of the front of the card with black acrylic paint.

I found some nice graduation card sentiments on line.
I used distress ink along the outside edges of the interior of the card.


There must be more that I can tell  you about that has been happening recently here in my world. Let me see . . .I have been cooking a little more and working on real estate a little more. I also started to sort through a lifetime of photographs. I have two large totes full of them. Some belonged to my parents and are of relatives who are long gone now. As I go through them, I plan to sort them and send them along to those who I think would like to have them. Email is a good thing for something like that, and if they want the hard copy, I will be happy to send them. It has been a goal of mine that I have saved for a snow day, but when the snow days come, I never have the boxes of photos at my finger tips. I think I am going to have to change that and keep them handy for times like today when it is rainy or on winter days when we have a blizzard! It is time to get this completed. Now that all of my photos are digital, I kind of miss having the real thing.

That is it for now. . .and until we meet again, may the Lord hold you in the hollow of His hand.

Emmy


Tuesday, June 16, 2015

April in Paris . . .


. . . . . Well, a girl can wish! Instead of taking a trip to France . . . sigh . . ., my online Face Book group, Craft That Divas, had a tag swap event. Each participant had to make two tags with the April in Paris theme and send them to their swap partners, affectionately known by us Divas as "swapners".  :-)  I made the tags and a few related items to send to my swapners, Rachel and Janice.

The first one is very fitting for the kind of weather we have been experiencing. Rain. Rain. Rain. I thought that Paris would be romantic on a rainy day, so I tried to evoke a misty day in Paris.

The second one is more along the lines of what most of us might think about April in Paris . . . beautiful blossoms and sweet fragrances on the spring air.

Take a look. I have put captions on the photos.

For Rachel . . . 
A rainy day in Paris . . .
I made this one a shaker with some fine silver glitter as the rain.
I could not find an umbrella image that I liked, so I drew this one.
I cut it into sections and trimmed them a wee bit so you can see them on the umbrella.
The umbrella handle is grungeboard
I used my little block letter stamps to print the letters of the words.
I made a little box to hold a surprise for Rachel.
The top closes with a Velcro dot.
A stick pin in rainy day shades.
Crafters use stick pins in projects and they can also be worn as an accessory.
Remember the '80's? I used to wear beautiful large-brimmed hats with a stick pin in the brim or on my lapel.

The stick pin and box.
Altered Dominoes.
I made a little Domino Book.
These are fun to make and as my friend Tiffany says . . . they are PNP . . .
Pretty 'n Pointless.
That does't mean she doesn't like them, though!
But isn't it fun to play, even when we are grown ups?
I love these little books!
The interior of the Domino Book.
As you can see, anyone can read this one!

I made a card for Rachel, carrying out the April in Paris theme.
I used an embossing folder to give the envelope some pizazz.

Here are the things I sent to Rachel.
The little packet on the right is some hand-dyed seam binding I included.
She can use it to hang her tag, or keep it for another project.
The hole at the top of the tag is still there. It is behind the trim, that is popped up on pop dots.
I used the Nature Garden paper stack by Prima for Rachel's tag and extras.
For Janice . . .
For Janice, I used the same Eifel Tower die as I did for Rachel's tag.
I embossed and painted it and the fleur-de-lis with a paint I mixed to resemble bronze or metal.
I used part of a die that is a branch-like "on the edge" die by Tim Holtz.
I cut it out of grunge board.
To give it the look of bark, I embossed it with my script embossing folder and painted it brown.
I glued seed beeds in the centers of the flowers.
I added a stamped image of a fleur-de-lis on the background paper.

Just like the box I made for Rachel.
And a stick pin for Janice, too.

The stick pin and box.

Janice received a Domino Book, too!
There is a little bit of reading in Janice's book. LOL!
(Although, it might even be in French!)

Janice's card and embossed envelope.

Here are the things I sent to Janice, including some hand-dyed seam binding she can use to hang her tag, if she wishes.

I used the Something Blue paper stack by Prima for Janice's tag and extras.


There are so many projects I have made in the past few months that never made their way to a blog post. I am playing catch up, so you will be seeing posts more often for a while. I am grateful to have the time today to post this because I was supposed to be in Buffalo at a check up with my doctor. He had to cancel due to an emergency. Now, onto some of the other projects that are on my craft table. I might even break out the sewing machine and sew for a change. I have a few projects with deadlines in my sewing room, too!


Thanks for stopping by and until we meet again, may the Lord hold you in the hollow of His hand.

Emmy


Saturday, June 13, 2015

Where did I go?

Once again . . .It has been forever since I posted on my blog. I waited because there were some projects that I was in the middle of and didn't want to spoil the surprise of the recipient. I think from now on, I will just post on my blog the day after I complete something! There will be more frequent posts, too!

Our weather has finally turned into true spring-like weather. I am happy for it. There has been a lot of rain, It makes the weeds grow nice and tall! I need to get out and pull them while the ground is still soggy. I am looking forward to power washing the deck this week. I love playing with water! Our resident mourning doves built a nest on top of our downspout, but now they have hatched their young and they have all flown the nest. I couldn't wash it last week, or even have my morning coffee out there because they were sitting in my chair!


As part of an on line craft group that I am in, called Craft That Divas, on Face Book, I participated in a swap with one other partner. We call each other "swapners"! . . . Anyway . . . we made boxes out of ordinary manila file folders. This is the one I made for my swapner, Linda, in Hawaii. I followed a tutorial on YouTube:  https://www.youtube.com/watch?v=SZ7YllXqG70&feature=youtu.be&list=UUZ7irRP-Q6d3xE9I5oB5hXA

I combined my dress form die and my bird cage die to create my little "angel" on the front/top of the box.
Her wings are metal.
The flowers are all fussy cut from the paper and inked on the edges.
The paper line I used for this is Chateau Lavender by DCWV.


The inside flap is supposed to be like a greeting card, but I just decorated it instead! 


Here is the box part of the project.

Inside I placed another little box with a surprise inside.


As you can see, this ended up having a French theme.
I used my fleur des lis die to cut the shape.

I stamped the paper on the reverse side with a fleur de lis stamp.
The box closes with a magnet.


Inside the box are stick pins that I made in colors to match the lavender and green in the paper.

I altered a #8 tag to make the stick pin holder and used some of my hand-dyed seambinding for the bow.

We were to also include an ATC inside the box.
(Artist Trading Card) I  made a miniature, of sorts, of my little angel on the box cover.


I made a gate-fold card for Linda using my Eifel Tower die.


I have jumped back into my real estate career after recuperating from surgery in December, so now my crafting time is limited to early mornings and late at night. I don't mind though, because I love working with my clients. Having less time to craft just means I will be more organized in the long run, and maybe more productive   . . . maybe!

I hope you enjoyed seeing this project. I will be back more often with things I make. There will be lots of cards . . and then maybe I will make a mini album. Oh, and quilting. . . did you know I really DO make quilts, too! I wish there were more hours in the day!

Take good care, and until we meet again, may God hold you in the hollow of His hand.


Saturday, April 11, 2015

Some project shares and a little chat . . .


Almost three weeks have passed since my last blog post. I have been working on gifts and swaps, so most cannot be posted here yet. It is still chilly enough to keep me inside most days, so I have been crafting and also trying to clean out old files. My shredder and I have spent a lot of quality time together! When I look at some of the papers I have saved over the years, I am amazed at what I have kept. After I get finished with this task, I vow to never keep things I do not really need! I hope I keep my word to myself!
It is still hovering in the 30’s and 40’s most days and after a winter of recovery from surgery, I feel like a delicate flower who can’t take the cold!  I have been getting out a bit more to shop in some of my favorite stores and go for rides with my husband to see what is happening out in the world. We have had snow and rain and now it is just starting to green up. My husband cut a bunch of forsythia branches for me to force in the house. It is something I love to do and it ushers spring in a little early . . . at least inside! As you can see from the photo, they have a little way to go before we see their beautiful yellow blossoms!

In the online craft group that I am in  . . Craft That Divas. . . on Facebook, our leader recently had surgery, so as a surprise another member and myself organized a card shower. I made an easel card using the Graphic 45 paper that I have been hoarding and only use for special occasions . . . Fashionista. It was the very first designer paper I ever purchased and, like all of my Graphic 45 papers and embellishments, I love them it so much that I have a hard time cutting into them! I realize that does not make a whole lot of sense because I buy them with ideas for projects in mind. I do the same thing with beautiful cottons that I buy for quilts. I usually have a quilt in mind, but it doesn’t always get cut out and sewn. This is a habit I need to and want to break. Cutting into Fashionista is a step in the right direction! I have only used it three times, and each was for a gift or a card for someone.  
5"x7" Easel Card
I hand stamped the block letters for the phrase on the clock and fussy cut and inked the edges. I cut a second clock image from black card stock to give the clock more dimension. 

Side View of Easel Card
The popped up chipboard pieces hold the card front up.
 

 Easel card interior.
I hand stamped the block letters to create the sentiment and inked up the parchment paper to resemble the background in the dotted paper.

I didn't have the right color flowers . . . so I used my Spectrum Noir alcohol inks to dye these little gems that I had picked up a while ago in the bridal section at Michaels.  :-) 
I used some of my hand-dyed seam binding for the bow.

I used some of the scraps to embellish a handmade three-inch square box. These are sometimes traded by artists, as ATB’s . . .  Artist Trading Blocks . . . similar to ATC’s, which are Artist Trading Cards. I like it and I am keeping it! I like to look at it on my craft table. :-) If I was to make one to trade, it would be embellished and fancier!

Artist Trading Block
I used chipboard to make the box.

Front side view of ATB 

Back view of ATB 

Audio books are my companion in the studio. I love being able to listen and work at the same time! At night I read on my Kindle (while I watch/listen to TV!) and when I get tired of reading, I do some handwork that I keep next to my chair. I am back to making hexis (little fabric hexigons that I can use in a quilt project) and some wool appliqué and embroidery. Perhaps the wool piece will be done soon and I can show it to you here in a post.
Even though I enjoy it, organizing is one of my biggest challenges. This week I have been putting lots of my crafting doo dads and beads in small jars and labeling them. I hope to get this all done and get my studio all set up so I can take some photos to share. Right now, it is in disarray, which happens every time I finish a project. It takes a little extra time to put things away before I start anything new, but it really has to be done.  So, that is where I am at right now. Typing this is a good distraction! :-)
I plan to get to two meetings this coming week. My ArtCGirlz  http://artcgirlz.blogspot.com art group and Museum Quilt Guild  http://museumquiltguild.blogspot.com .  I hope I make it. It will be the first time I have attended either in about six months! Being laid up has really kept me out of the loop. Thank goodness, though, for blogs and Facebook. I have been able to keep up with much of what has been happening in both groups as well as with some of the members. 
That is about it for now. It is 7:00 in the evening and the sun is shining brightly. I am liking the time change!
As always, your comments are welcome!
And until we meet again, may God hold you in the hollow of His hand.
Emmy