Tuesday, June 30, 2015

How To Make An ATB Foundation Box

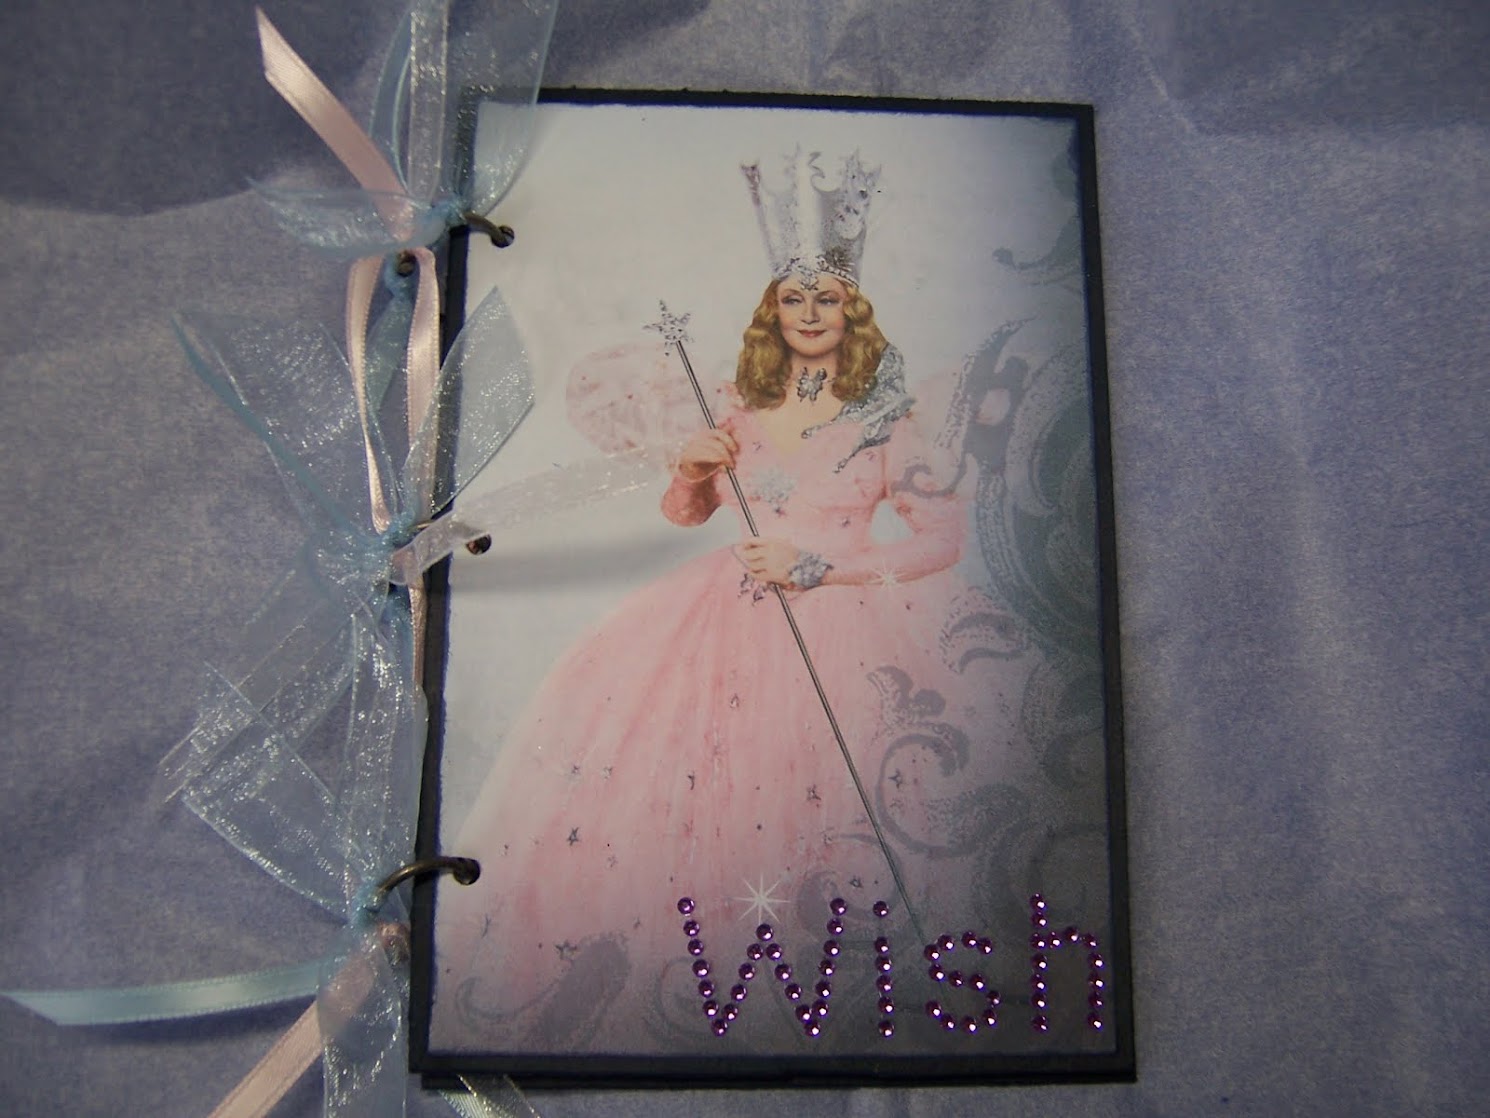
I made a very quick ATB today as a favor for a friend, who wanted to see how I made mine. An ATB is an Artist Trading Box. It is similar to an ATC, an Artist Trading Card. Artists swap these and they are little works of art.

I will put captions on the photos below to give you an idea of the steps I took to make this ATB.


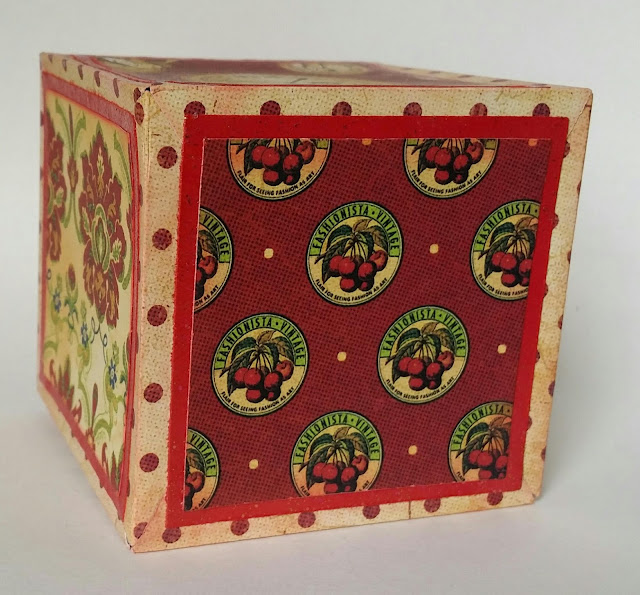
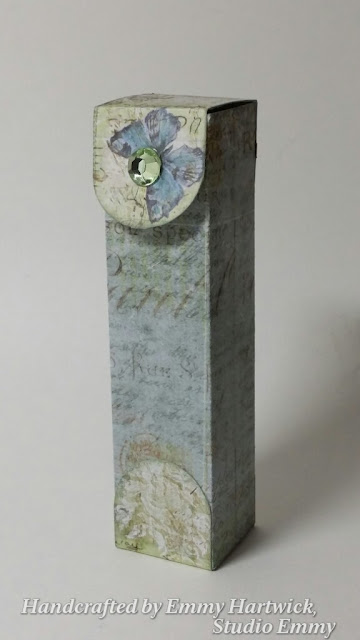
This is a 3 inch by 3 inch covered chipboard box.
It does not open.
It is merely to look at and enjoy.
It needs to be embellished, but I have not done that step yet.

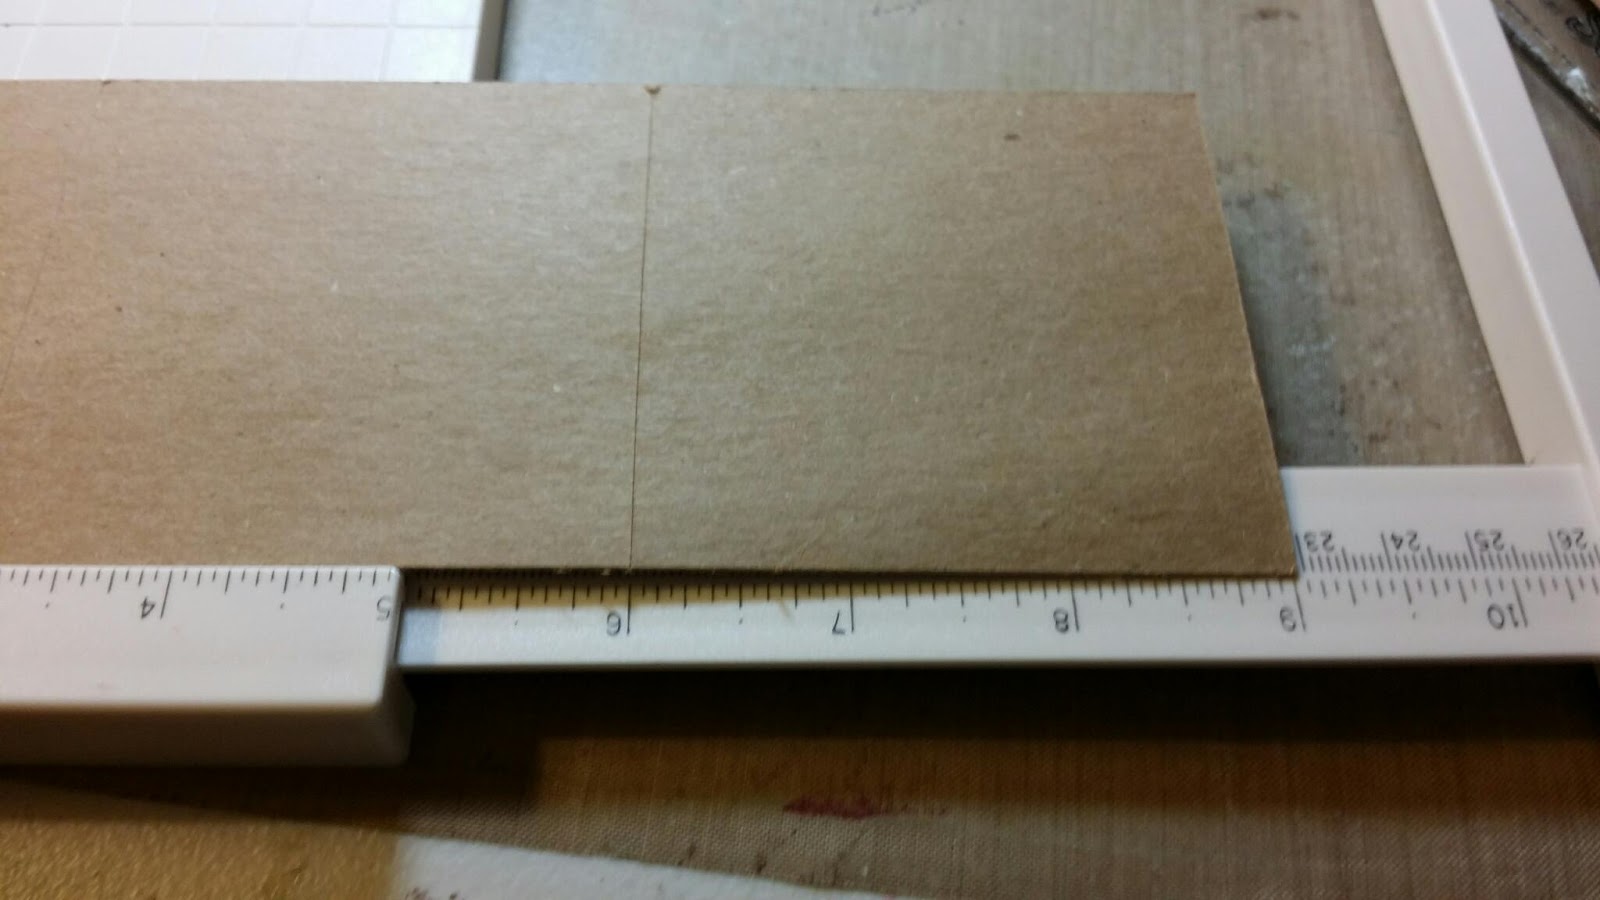
I started out with a 12 inch x 12 inch sheet of thin chipboard.
I prefer medium weight chipboard, but I did not have any on hand today.

I cut a 3 inch strip off the 12 x 12 sheet.

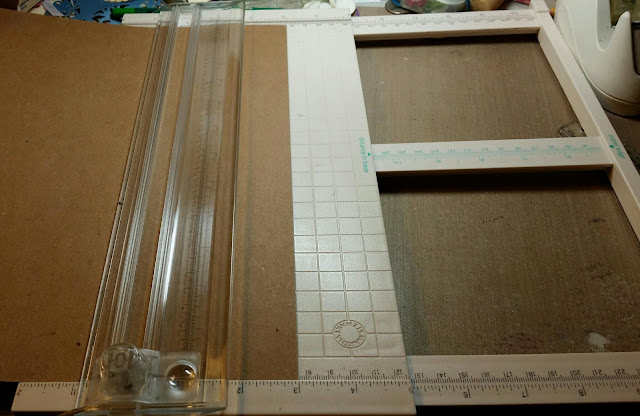
This is the sheet in the paper cutter ready to be cut.

This is the 3 inch x 12 inch strip.
I scored the 3 inch x 12 inch piece of cardstock every 3 inches. I did NOT cut thru it.
I lightly scored it.

I scored it at 3 inches, 6 inches and 9 inches.

You can see the score mark/ cut mark here.
Remember, this is not cut all the way thru the chipboard.

All three scores have been made with the cutting blade.
 
I used scotch tape to make the box.
It was quick and easy for this example.

You can see the beginning of the 3 inch x 3 inch box.

I cut two 3 inch x 3 inch squares.
You may need to add a 16th or an 8th of an inch to this depending on the depth of the chipboard you use.
Measure twice, cut once!

All taped up.
It is almost square!

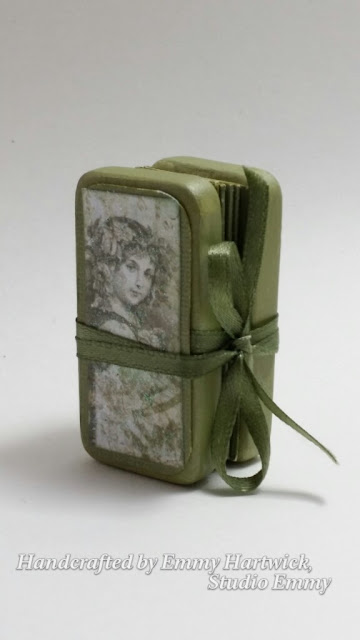
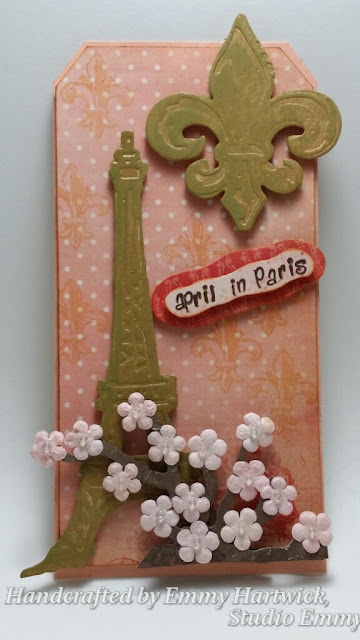
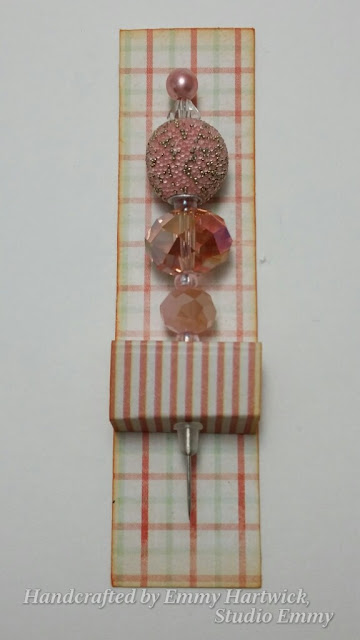
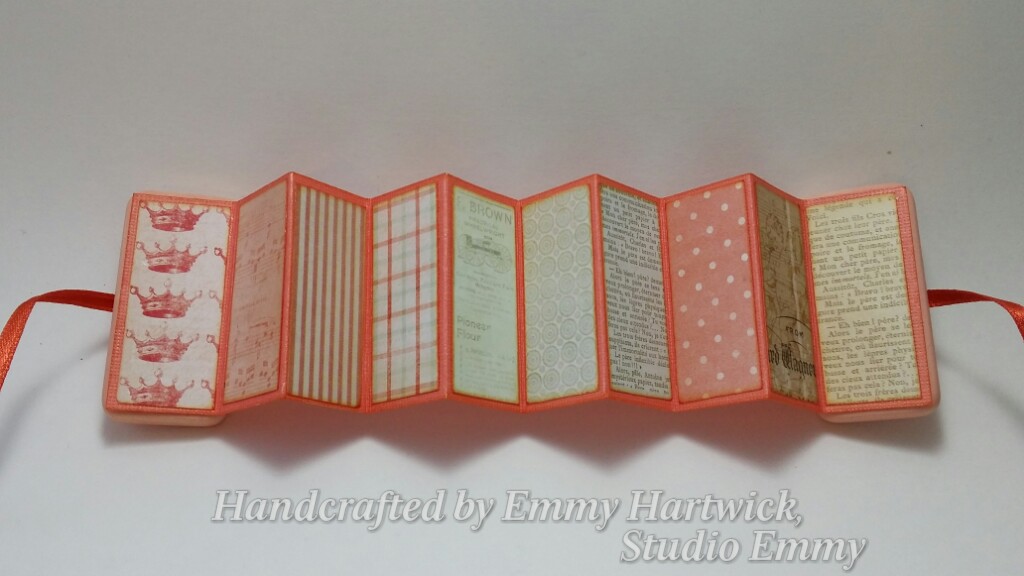
And . . . later on, you will be able to make something like this!

I don't have an example handy right now, but for the edges of the box,
I cut some 3 inch strips. they may be about 1.5 inches wide, or so.
I mitered the corners and this fortifies the box.
Before you begin this part, you may want to use gesso on the chipboard box to give it some "tooth".

View 1

View 2

View 3

 
View 4
The stripe is on the bottom of the box.


This is it for now . . . I hope you can follow this and of course, there are many ways to make a box!
This is just the way I have made them. :-)

As always, your comments and questions are welcome.

Until we meet again, may the Lord hold you in the hollow of His hand.

Emmy

Sunday, June 28, 2015

How to make a paper leaf: A Pictoral Tutorial

Sometimes, when it is very early in the morning, or very late at night, I realize I need something in my studio, but I cant find it. . . . like this morning. I wanted to put leaves on my card, but I could not find my leaves from Michaels. I buy the ones in the bridal section. So, I decided to make some leaves from my scrapbooking paper.

 
This is the card I was making. I will walk you through the simple steps of how you can make your own paper leaves.
You will need:
Scissors that have a fancy edge similar to these.
Some scrapbook paper.
A scoreboard and scoring tool.
An ink pad.

 Fold one end up a bit
 so that it is half the width
of what you want your finished leaf to be.
Use your fancy edge scissors
 to cut an elongated oval
on the fold you just made in the previous step.

Keep the "leaf" folded in half.
Use a scoreboard to mark the "veins" in the leaf.
Put the leaf at a slight angle on the board to do this step.
Unfold your leaf.
When you are finished scoring it,  
it will look something like this.
Use an ink that matches the paper to ink the edges of the leaf.

I inked it on top and underneath to get as much ink along the edges as possible.
Also, run the ink pad lightly along the center fold and along the veins for some dimension.
Use a pencil or the handle of a paint brush to give your leave a bit of a curve.
Simply run the pencil or handle under the paper leaf and it will take on a bit of a curve.
If you want to add more dimension,
curve the leaf a bit in the opposite direction before you glue it to your project.
I used a dab of hot glue to attach the leaf to my card.
You can see how I used the leaves behind the roses and ribbon.


It worked and when you look at the card,
you don't really notice that the leaves are made of scrapbook paper! 
I actually like the technique and think I will use it often.
 

Thanks for stopping by.
If you want to see this in a slide show,
please check out the video on my You Tube Channel:


As always, your comments and questions are welcome . . . and until we meet again, may the Lord hold you in the hollow of His hand.

Emmy
 

Saturday, June 27, 2015

Babies and Graduation . . .


It is a rainy Saturday. I planned to do many things today and also go to a graduation party, but between the constant pouring rain and not feeling 100%, I am just staying home. It has been a long week of challenges and it feels good to just stay in my cozy house and catch up on some recorded TV shows and movies and spend some quiet time here with my hubby. It seemed like a good day to catch up on my blog. :-)

I have continued to make cards. Here are a few that I made recently.
.
I made this for a friend who recently became a grandmother.
 It is her wish that the baby will call her "Oma", which is the German form of Gramma.
I made this card to celebrate her new grandson and the hope she will get her wish.
I mixed acrylic paints to get the right shade of yellow for the edges of the card front.
 I cut the letters out with one of my dies and tried to make the letters look like building blocks.

On the inside of the card, I put a rattle that I made from using one of my scalloped oval nesting dies.
 I stacked it with cardstock for dimension, and inside I placed little confetti images I picked up at Michaels.
I traced the handle of a meat fork for the handle!
 It is a shaker, but being on the inside of a card, it really doesn't get shaken very much.
I used acrylic paint along the edges of the inside of the card.
 
Purple and Gold are the school colors for this graduate.
I used some distress ink on the outside edge of the front of the card.
I used 6-strand embroidery floss to make the tassel.
I found the inspiration for this card on Pinterest.

I use my MS Word program to print the interior of some of my cards.
This is printed on parchment.
I used distress ink along the outer edge of the interior of the card.

My alma mater, Le Roy High School's colors.
I used one of my dies to cut out the letters and numbers.
I put some black glitter glue on them and on the cap to glam it up a bit.
I painted the outside edges of the front of the card with black acrylic paint.

I found some nice graduation card sentiments on line.
I used distress ink along the outside edges of the interior of the card.


There must be more that I can tell  you about that has been happening recently here in my world. Let me see . . .I have been cooking a little more and working on real estate a little more. I also started to sort through a lifetime of photographs. I have two large totes full of them. Some belonged to my parents and are of relatives who are long gone now. As I go through them, I plan to sort them and send them along to those who I think would like to have them. Email is a good thing for something like that, and if they want the hard copy, I will be happy to send them. It has been a goal of mine that I have saved for a snow day, but when the snow days come, I never have the boxes of photos at my finger tips. I think I am going to have to change that and keep them handy for times like today when it is rainy or on winter days when we have a blizzard! It is time to get this completed. Now that all of my photos are digital, I kind of miss having the real thing.

That is it for now. . .and until we meet again, may the Lord hold you in the hollow of His hand.

Emmy


Tuesday, June 16, 2015

April in Paris . . .


. . . . . Well, a girl can wish! Instead of taking a trip to France . . . sigh . . ., my online Face Book group, Craft That Divas, had a tag swap event. Each participant had to make two tags with the April in Paris theme and send them to their swap partners, affectionately known by us Divas as "swapners".  :-)  I made the tags and a few related items to send to my swapners, Rachel and Janice.

The first one is very fitting for the kind of weather we have been experiencing. Rain. Rain. Rain. I thought that Paris would be romantic on a rainy day, so I tried to evoke a misty day in Paris.

The second one is more along the lines of what most of us might think about April in Paris . . . beautiful blossoms and sweet fragrances on the spring air.

Take a look. I have put captions on the photos.

For Rachel . . . 
A rainy day in Paris . . .
I made this one a shaker with some fine silver glitter as the rain.
I could not find an umbrella image that I liked, so I drew this one.
I cut it into sections and trimmed them a wee bit so you can see them on the umbrella.
The umbrella handle is grungeboard
I used my little block letter stamps to print the letters of the words.
I made a little box to hold a surprise for Rachel.
The top closes with a Velcro dot.
A stick pin in rainy day shades.
Crafters use stick pins in projects and they can also be worn as an accessory.
Remember the '80's? I used to wear beautiful large-brimmed hats with a stick pin in the brim or on my lapel.

The stick pin and box.
Altered Dominoes.
I made a little Domino Book.
These are fun to make and as my friend Tiffany says . . . they are PNP . . .
Pretty 'n Pointless.
That does't mean she doesn't like them, though!
But isn't it fun to play, even when we are grown ups?
I love these little books!
The interior of the Domino Book.
As you can see, anyone can read this one!

I made a card for Rachel, carrying out the April in Paris theme.
I used an embossing folder to give the envelope some pizazz.

Here are the things I sent to Rachel.
The little packet on the right is some hand-dyed seam binding I included.
She can use it to hang her tag, or keep it for another project.
The hole at the top of the tag is still there. It is behind the trim, that is popped up on pop dots.
I used the Nature Garden paper stack by Prima for Rachel's tag and extras.
For Janice . . .
For Janice, I used the same Eifel Tower die as I did for Rachel's tag.
I embossed and painted it and the fleur-de-lis with a paint I mixed to resemble bronze or metal.
I used part of a die that is a branch-like "on the edge" die by Tim Holtz.
I cut it out of grunge board.
To give it the look of bark, I embossed it with my script embossing folder and painted it brown.
I glued seed beeds in the centers of the flowers.
I added a stamped image of a fleur-de-lis on the background paper.

Just like the box I made for Rachel.
And a stick pin for Janice, too.

The stick pin and box.

Janice received a Domino Book, too!
There is a little bit of reading in Janice's book. LOL!
(Although, it might even be in French!)

Janice's card and embossed envelope.

Here are the things I sent to Janice, including some hand-dyed seam binding she can use to hang her tag, if she wishes.

I used the Something Blue paper stack by Prima for Janice's tag and extras.


There are so many projects I have made in the past few months that never made their way to a blog post. I am playing catch up, so you will be seeing posts more often for a while. I am grateful to have the time today to post this because I was supposed to be in Buffalo at a check up with my doctor. He had to cancel due to an emergency. Now, onto some of the other projects that are on my craft table. I might even break out the sewing machine and sew for a change. I have a few projects with deadlines in my sewing room, too!


Thanks for stopping by and until we meet again, may the Lord hold you in the hollow of His hand.

Emmy